The human ear’s self-cleaning mechanisms are pretty effective, but what is good for the ear isn’t necessarily good for a hearing aid. Learning how to clean a hearing aid is an important task if you want to keep yours functioning well.
Earwax may not be a particularly appealing substance, but it does have a purpose. As the American Academy of Otolaryngology explains, earwax helps to cleanse and protect the ear by clearing away dead skin cells and other debris. It also lubricates the delicate skin of the inner ear as it slowly journeys from deep within the ear to the ear’s exterior. Unfortunately, the earwax and moisture that work together to keep the ear tidy have the opposite effect on hearing aids. Understanding how to clean a hearing aid and making the task a part of your regular routine will help ensure that the device continues to do its job effectively.
Preparing to Clean a Hearing Aid
The experts at Healthy Hearing recommend setting aside time to clean your hearing aid at the end of each day. Since hearing aids aren’t worn to bed, this allows time for the device to dry completely before being pressed into service again. It’s also smart to put some thought into where you clean your hearing aid. If possible, opt for a spot with a soft surface to minimize the damage in case you happen to drop the device while cleaning it. Hearing aids are small and delicate, after all. A folded towel placed on a counter or tabletop can save you a lot of heartache if your hearing aid slips out of your fingers. Lighting is also a factor. A bright, well-lit space makes it easier to see what you’re doing.
Tools for Cleaning a Hearing Aid
Whether your hearing aid is an in-the-ear or behind-the-ear model, you will need similar tools to keep it clean. These include a hearing aid cleaning brush with gentle bristles, a wire loop, and a wax pick. These items are available as individual units, or you can find them all combined in one convenient tool. Some of these tools will also include a magnet that makes handling the small batteries that power your hearing aid easier. In addition, you’ll find it helpful to have a soft, clean cloth and a bulb blower on hand. Once you’ve picked your time and place and gathered your tools, it’s simply a matter of following the appropriate steps for cleaning your type of hearing aid.
Steps for Cleaning an In-the-Ear Hearing Aid
An in-the-ear hearing aid sits nestled in the ear canal. To clean this type of hearing aid, follow these steps:
Examine the device, and note any areas where debris has accumulated.
Begin gently clearing the openings in the device. When cleaning an opening, hold the hearing aid with the opening angled downward so that the debris doesn’t fall back inside.
To clean the microphone, run the brush gently across the port. The microphone is extremely delicate, so avoid the temptation to poke anything into this opening.
To clean the receiver, brush the opening. Then, use the wax pick or wire loop to carefully scoop any lingering wax or debris from the opening.
Use a soft, clean cloth to wipe off the device’s case. With this style of hearing aid, wax tends to cling to the bent areas.
Remove the batteries, and sweep away any clutter with the brush. Leave the compartment open overnight so that it can dry out completely.
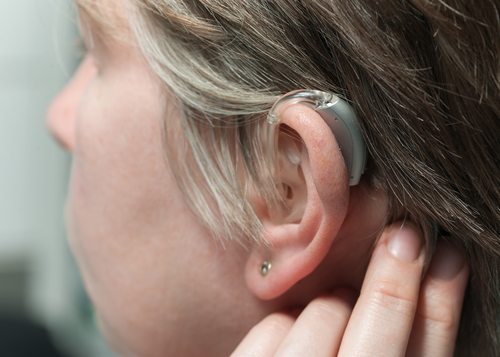
Steps for Cleaning a Behind-the-Ear Hearing Aid
With a behind-the-ear hearing aid, part of the device tucks into the ear canal and the remainder sits behind the outside ear. To clean this type of hearing aid, follow these steps:
Look over the device, and identify places where debris has accumulated.
Wipe off the device with a soft cloth. Then, use the brush and wire loop to clear the openings in the device. Again, it is best to hold the device so that the opening you are cleaning is angled down so that any debris you knock loose falls out instead of tumbling further inside the opening.
Detach the ear mold, and wipe it clean. For stubborn stains, you can use a cloth dampened with warm, soapy water. If you use this approach, always ensure that the ear molds are completely dry before reattaching them.
Take the batteries out of the hearing aid and sweep the compartment with the cleaning brush. Leave the compartment open overnight to dry.
Knowing how to clean a hearing aid can protect the functionality of your device, improve your comfort, and help you avoid costly repairs.
If you are having issues with your hearing aid, contact an audiologist. Schedule a consultation with Apex Audiology today if you live near Limon, Pueblo, or Colorado Springs, Colorado. To get started, call us at 719-247-9000 or schedule an appointment online. We look forward to hearing from you!
Schedule An Appointment
With a variety of hearing technology available, we’ll find the right fit for your lifestyle!
This website uses cookies so that we can provide you with the best user experience possible. Cookie information is stored in your browser and performs functions such as recognising you when you return to our website and helping our team to understand which sections of the website you find most interesting and useful.
Strictly Necessary Cookies
Strictly Necessary Cookie should be enabled at all times so that we can save your preferences for cookie settings.
If you disable this cookie, we will not be able to save your preferences. This means that every time you visit this website you will need to enable or disable cookies again.